Designing webinars with Microsoft Teams

A webinar is an ideal format for getting information across to a large number of people simultaneously – whether or not they are part of your organization. The presenters can base the webinar on a presentation, give a system demonstration or incorporate preprepared video sequences. It’s a synchronous format with the added benefit of not tying anybody to any one place.
The basic features that can be used in a webinar are similar to those used in conventional Microsoft Teams meetings. However, during a webinar, you can stipulate that participants must have their microphone muted and camera off and can’t share content either, for example. This ensures that the focus stays very much centered on the webinar’s presenters. All the same, to ensure there is still an interactive element, you can enable the chat feature for the webinar or use the practical question-and-answer feature, which offers additional moderation options.
Attendees need to register for the webinar in advance, and you can adapt the relevant registration form to suit your needs. Microsoft Teams recently launched the concept of having a dedicated site for each webinar that you can design to your own specifications, including a company logo, for example. The site also provides information about the presenters and the content of the webinar and incorporates the registration form.
The features available for webinars were recently reworked and extended. Let’s take a look at the new user interfaces and setting options.
Creating a new webinar
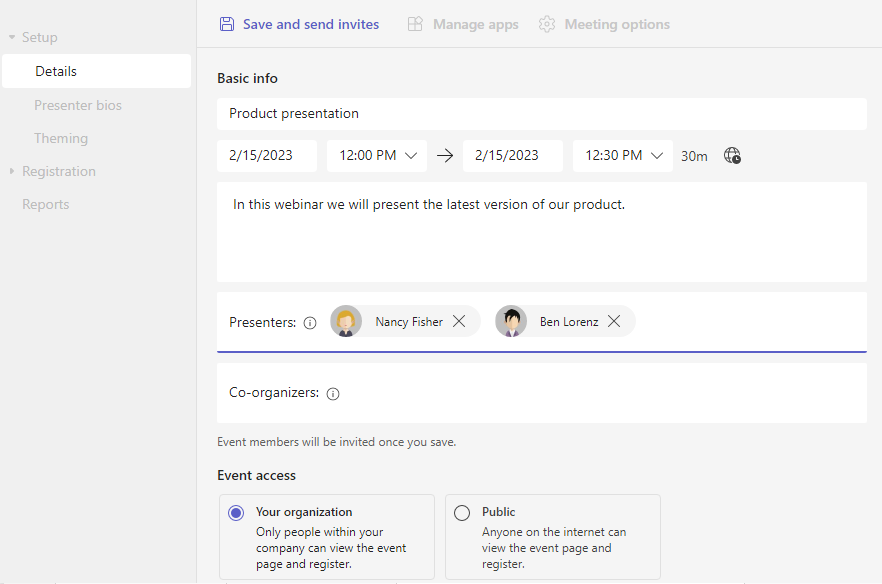
The webinar features in Microsoft Teams have been extensively overhauled and these changes primarily affect the way webinars are set up. When you want to create a new webinar, the first step is to enter basic information. That includes things like the title of the webinar and a description of what it will include and the topics it will cover.
You can also enter the details of the presenters and co-organizers here. Presenters are able to speak during the webinar and can switch on their cameras. Co-organizers can manage the webinar before and during the event. For instance, they can admit participants and take care of the question-and-answer feature.
The last thing to do in this step is stipulate whether the webinar is to be publicly accessible or restricted to people within your own organization. Once you have saved the webinar, additional features and functions become available for editing. By the way, when you save your webinar, invitations are only sent to the presenters and co-organizers. At this point, your webinar has not yet been published.
Editing meeting options
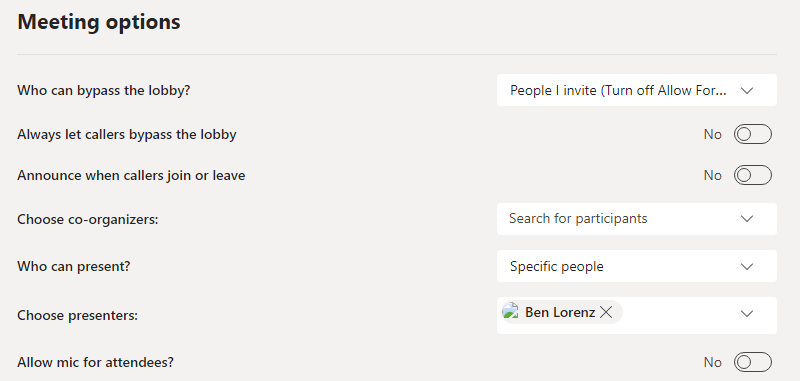
You can use the meeting options for your webinar to determine what attendees and presenters are allowed to do.
You can specify exactly who can share their screen or use their microphone. You can also enable or disable features that support interaction with attendees. These include the question-and-answer feature.
Editing the registration form
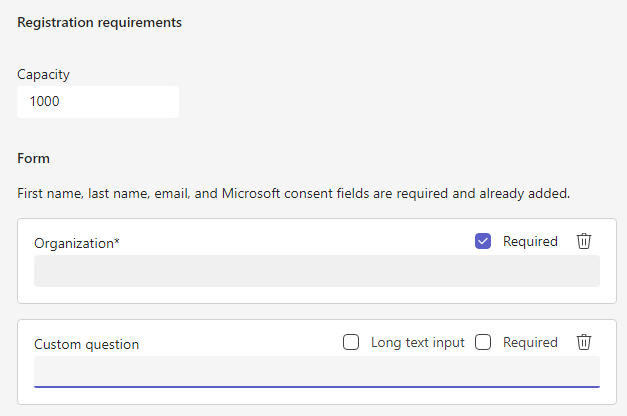
Think about what kind of information you want to get from attendees. People who want to attend your webinar must first complete the registration form. Certain fields are required and are therefore included in the form as standard, but you can incorporate additional predefined fields and even your own customized questions. You can also specify whether any of the additional fields you include are required fields that must be completed by the person registering.
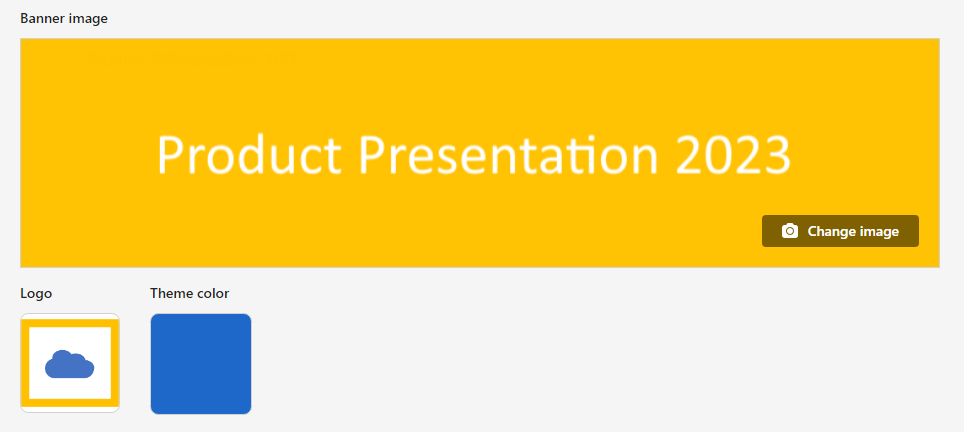
Modifying the site design
The registration form is accessed via a dedicated site. Every new webinar in Microsoft Teams gets its own site where basic information such as the date, topic and presenters are published along with the registration form. You can add your own banner image and logo and specify a custom theme color for icons. This gives you the opportunity to integrate your corporate design, for example.
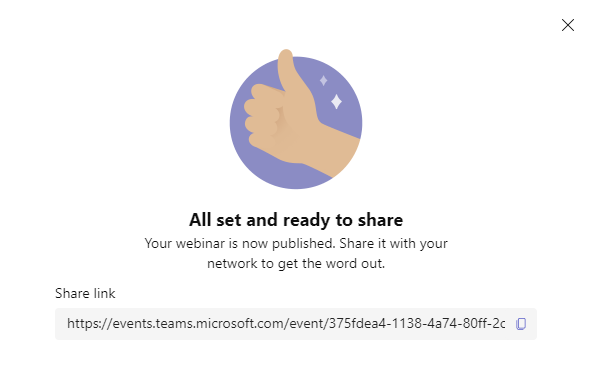
Publishing the site
Your webinar is only open for registrations once you have published its site. You can then send out a link to this site via an email distribution list or publish it on your organization’s website. Anyone who is interested in attending your webinar will find the registration form on the site.
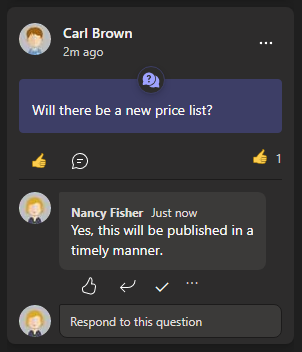
Using the question-and-answer feature in a webinar
To give attendees the opportunity to ask questions, you will need to enable the Q&A feature. Any questions that arise during the webinar can thus be grouped together and made visible to everyone. Co-organizers can then moderate questions via the question-and-answer feature. They can filter out duplicate questions, close down questions that have been answered so no further comments can be added, and pin important questions higher up in the list.